
Send your first push
End-to-end: upload credentials, register a device, send a test, ship a campaign.
An Apple Developer account (for iOS) or a Firebase project (for Android), your app's credentials, and your app running with the SDK installed.
1. Upload credentials
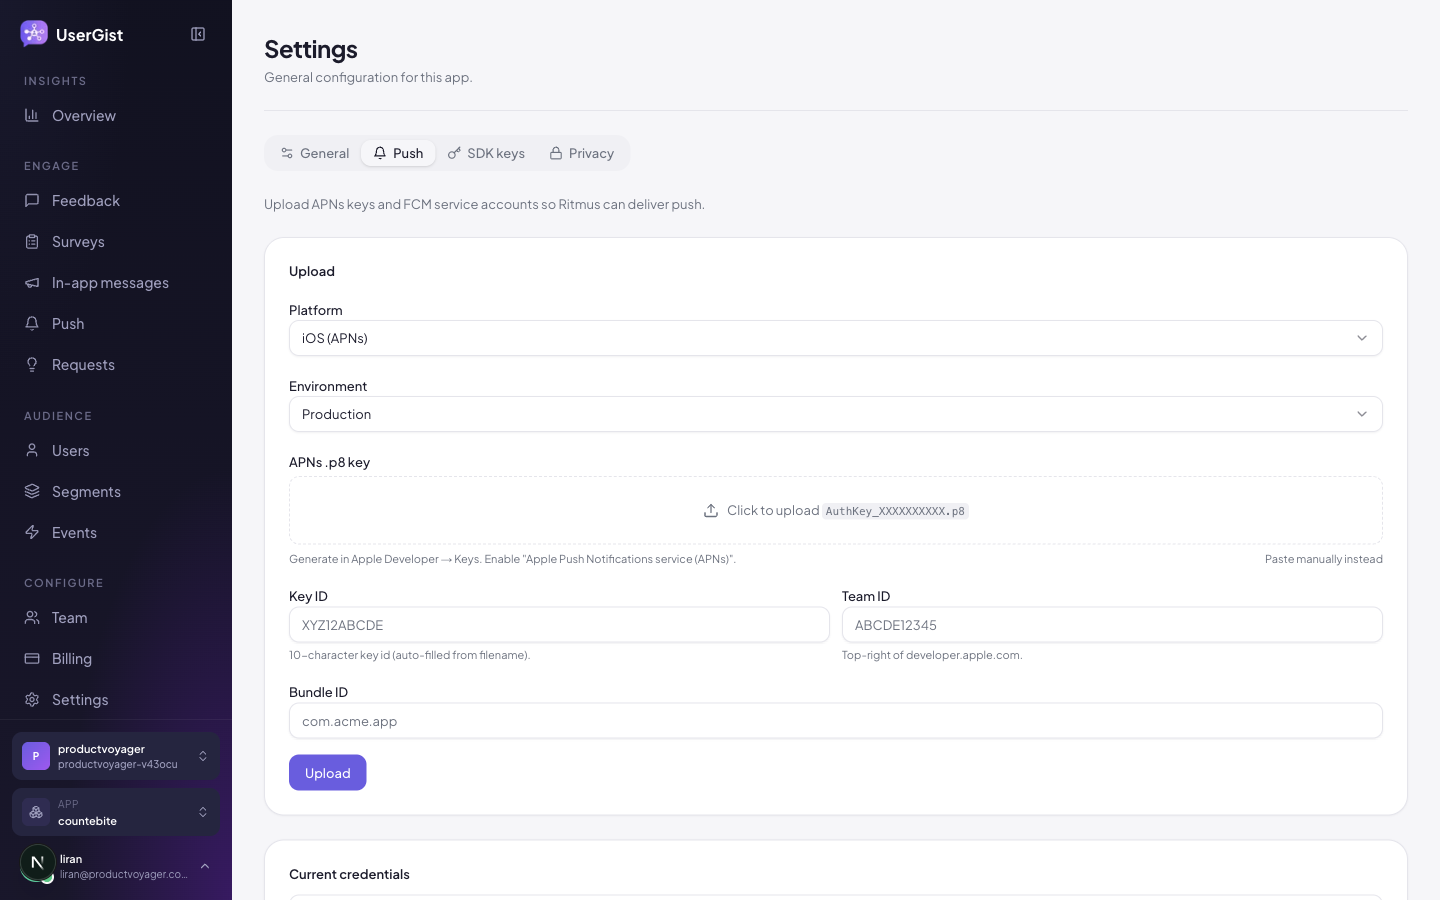
iOS — APNs .p8
- 1
Generate the key
developer.apple.com → Keys → +. Enable Apple Push Notifications service (APNs). Download the
.p8(you only get one shot). - 2
Note the Key ID and Team ID
Key ID is on the same screen. Team ID is in the top-right of the Apple Developer site.
- 3
Upload to userGist
During onboarding push setup, or in App settings → Push, upload the
.p8, Key ID, Team ID, and Bundle ID. Usesandboxfor development builds orproductionfor TestFlight and App Store builds.
Android — FCM service account
- 1
Generate the service-account JSON
Firebase Console → Project settings → Service accounts → Generate new private key. Download the JSON.
- 2
Upload to userGist
App settings → Push → Android → Upload JSON. userGist parses the file and shows the resolved project ID — confirm it matches your
google-services.json.
2. Wire the SDK
Connect these examples after SDK initialization to your app's existing notification permission flow. You choose when and where permission is requested. If permission and token handling already exist, forward their results to UserGist; no additional permission prompt or screen is needed. Push needs both OS notification permission and UserGist push consent; the initial SDK installation leaves push consent off. Enable only the push purpose after the user opts in.
// After the user opts in to push in your app
await UserGist.setConsent({ push: true })
const permission = await UserGist.enablePush()
if (!permission.granted) await UserGist.setConsent({ push: false })
Flutter: the APNs token may not be ready immediately after permission is granted. Retry registration once it is available and forward refreshed tokens; see Firebase's token setup. Match the iOS environment to the signed build's aps-environment entitlement when using a custom build configuration.
On iOS, also add the Notification Service Extension as described in SDKs → iOS. Delivery analytics rely on it.
Existing permission and a missing saved preference
When adding UserGist to an app that already sends notifications, read the existing app-owned preference as three states: absent, true, or false. Do not create a new key or turn an absent value into false. The SDK's initial push: false is not evidence that the person opted out in your app.
| Saved app preference | Current OS permission | Launch/resume behavior |
|---|---|---|
| Absent | Fully authorized | Persist true in the existing preference, sync only UserGist push consent to true, then register the device token without requesting permission again. |
false | Any state, including authorized | Preserve the explicit opt-out; keep UserGist push consent off and do not register with UserGist. |
true | Authorized | Restore push consent and register the current token without another permission request. |
Absent or true | Denied, not determined, or unavailable | Keep UserGist push consent off and preserve the app preference; leave permission requests in your existing user-initiated flow. |
Provisional or ephemeral permission alone is not proof of a prior app opt-in. Preserve your app's existing policy for these states rather than treating them as full authorization for this migration.
Use a presence-aware read in the app's existing storage and account scope. On iOS, UserDefaults.bool(forKey:) returns false for a missing key, so inspect presence separately and account for registered defaults. In React Native and Expo, preserve an absent storage value instead of coercing it to a Boolean. With Android SharedPreferences, check contains(key) before getBoolean. With Flutter SharedPreferences, preserve the nullable getBool result instead of using ?? false.
For an iOS user whose preference is absent and permission is already .authorized, save the app's opt-in, call UserGist.shared.setConsent(Consent(push: true)), then call UIApplication.shared.registerForRemoteNotifications() on the main thread. Forward its token through your existing AppDelegate's didRegisterForRemoteNotificationsWithDeviceToken callback to UserGist.shared.push.didReceiveDeviceToken(deviceToken). Do not call requestPermission() in this restoration path.
Reconcile after SDK initialization and on app resume. Serialize this work against opt-outs and account changes so an old permission callback cannot restore consent for the wrong state. Token or network failures must not overwrite the app's saved preference; retry registration when ready. Inspect the actual stored state before concluding that a missing preference caused a registration problem.
Saving a credential checks its format and stores it. Confirm push delivery for your app with its own credentials, permissions, registered token, and a notification you actually receive.
3. Confirm your device is registered
In onboarding push setup, find and select your signed-in or anonymous app user, then refresh device status. You can also use Audience → Users → your test user → Push. Check that push consent is approved and an active registered device appears.
If it's missing:
- Make sure the OS permission dialog was accepted.
- Make sure UserGist push consent is enabled and the SDK forwards the current device token.
- If permission was already allowed, check the existing preference migration. User approved reflects UserGist's recorded push consent, while Device registered requires a registered token; OS permission alone does not mark either check complete.
- iOS: the bundle ID in the APNs credential must match your build's bundle ID exactly.
- Android: the
google-services.jsonproject ID must match the uploaded service-account JSON.
4. Send a test push
From onboarding push setup, choose your own test user, enter a title and body, and press Send test. Later, use the same sender in the user's profile. The test targets that user's active devices; it does not create a campaign. Put the app in the background and check for the notification. A dispatched result does not confirm receipt; if sending fails, check the displayed reason and retry after fixing it.
Title: Hello from UserGist
Body:  Your first test push is here.
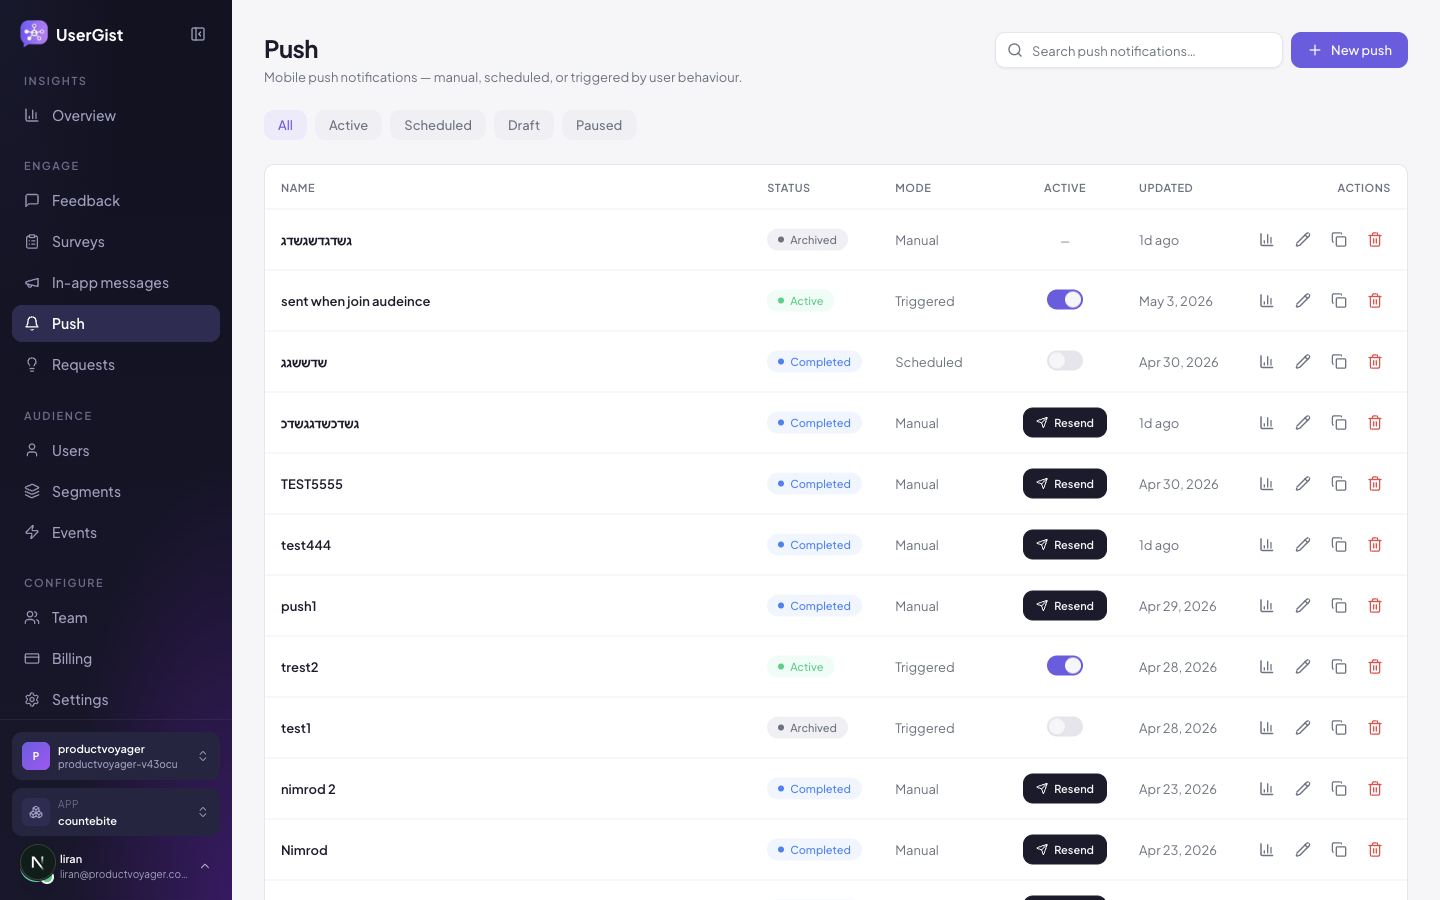
5. Build a real campaign
- 1
Write the message
Title + body. Add an optional image and a destination such as
acme://orders/UG-1042. Use Insert field for a saved name or event value; the picker creates the matching field definition. - 2
Pick a channel
Android: pick a channel users can opt out of (e.g.
marketing). iOS: default category. - 3
Trigger
Triggered on
order_shipped, or Scheduled for a one-shot announcement. - 4
Segment
Pick or create a segment (e.g. Active in last 30 days, opted into marketing).
- 5
Send / publish
Send now for one-shot, Publish for triggered.
For a greeting or a continue watching push, follow Personalize messages. It covers source selection, Preview as user, and JSON tap actions that pass a string show ID and numeric playback position to your React Native app. Resolve the chosen recipient before test sending, then verify the tap opens the correct destination.
6. Watch the funnel
Open the campaign detail page. The funnel shows Sends → Delivered → Displayed → Opened → Clicked. Drop-off between Sends and Delivered usually means invalid tokens; userGist auto-invalidates them.
Common pitfalls
- Wrong APNs environment. Register development tokens as
sandbox; TestFlight and App Store tokens asproduction. The token environment determines the APNs destination. See Apple's APNs environment reference. - No NSE on iOS. Without the Notification Service Extension, you'll see Sends and Opened but no Delivered — the OS gave it to your app without telling us.
- Firebase project mismatch. Service-account JSON and
google-services.jsonmust come from the same Firebase project.
What's next
- Features → Push
- API → Webhooks — react to delivery events server-side
- Admin → Push credentials